

As a blogger or a website administrator, one of the issues you should be concerned about is "How Long Do My Website Visitors Spend On My Blog/Website". This is a fundamental question that needs to be answered by all bloggers/website administrator because the amount of time spent on your website by each visitor goes
a long way to determine the health of your website, its page ranking, etc.

As a blogger/web administrator, you need to derive means to keep your web visitors on your website for as long as possible, but how can you achieve that?.
 Keep the width to three stories i.e three thumbnails if your post width is less than 500px.


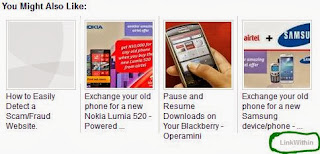
After adding the plugin, you might notice that there is a LinkWithIn link on the bottom-left of the widget, as shown below. If you are not comfortable with that link, you may consider removing the LinkWithIn link on the plugin/widget.
Thanks for going through this post.
Hope that this helps.
Please feel free to drop your comments and questions below, we love to hear from you.
a long way to determine the health of your website, its page ranking, etc.
As a blogger/web administrator, you need to derive means to keep your web visitors on your website for as long as possible, but how can you achieve that?.
- Good content is the key factor that can keep your visitors on your website for a longer period of time.
- Inter-Linking your Blog/Website pages: by this I mean your ability to redirect a visitor to another pages on your website from the present page on-which he/she is working on. This can be achieved by linking one or more text on each page to a different page on your blog/website. Another way to effectively inter-link our blog/website pages is through the use of "Related Posts" plugin/widget on our blog/website. Though the use of "Related Posts" plugins on our blog/website is highly recommended, but Blogger Blog does not offer a "Related Posts" plugin for its users; but don't worry because today am going to teach you the simplest way of adding a "Related Posts" plugin to your blog/website.
How to easily add Related Posts plugin to your blog/website.
There are lots of posts & codes on the internet that explains how you can achieve this plugin on your blog/website but most often, these codes those not work for all website/blog templates and platforms. Therefore I personally recommend the use of Linkwithin.
- Go to Linkwithin.
- Fill up the easy form and follow other instructions

- Click on the Get Widget button
- On the next page, click the Install Widget link
- Change the Title to Related Posts: or anything you may like as shown below

- Now Click the Edit Template Link (highlighted on Red in the picture above)

- Replace the code that you see with the code below (This code will prevent the thumbnails from appearing on the website/blog homepage):
- Now click the Edit Content Link (highlighted on Green in the picture above) and add the following additional code just above the code inside the widget (Replace Related Posts: with any text you want.)
- Next, Click on the Add Widget button.
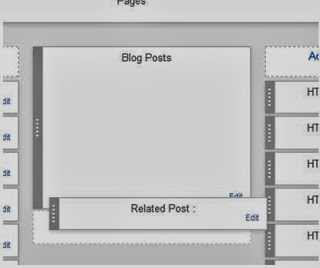
- You should be taken to your blog layout. Simply drag the newly added widget to the bottom of your blog post (this is not mandatory, but it recommended to ensure maximum performance).

- Now click on Save Arrangement on the top of your layout page.
After adding the plugin, you might notice that there is a LinkWithIn link on the bottom-left of the widget, as shown below. If you are not comfortable with that link, you may consider removing the LinkWithIn link on the plugin/widget.

Thanks for going through this post.
Hope that this helps.
Please feel free to drop your comments and questions below, we love to hear from you.
Don't miss out of any post, Receive all the latest post/updates via Email. Enter your email below. ...... Peace !!! .....


No comments:
Post a Comment